Assigning Roles to Recipients
In this section you will learn how to assign different roles to recipients.
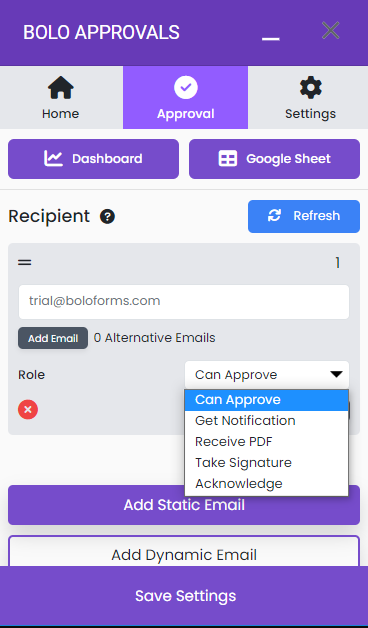
Can Approve- This role is for the recipients that can approve/reject a request.
Get Notification- This role is for the recipients who will get notified only in the process of the approval workflow.
(For eg. In a multi-step approval workflow, if a recipient with the Role 'get notified only' is added in step number 2, they'll get notified with the status of the approval of recipient in step number 1.)
Receive PDF- This role is for the people who want to receive a pdf copy for the confirmation of the approval request.
Take Signature- In this role the user has to sign and approve. His/her signature will be visible in dashboard
Acknowledge - In this role user has to acknowledge that they have received this request
From your Google Form, open the add-on.
Add a recipient.
Click the drop-down menu in front of the 'Role'.
Choose the desired role, and click 'Save Settings'